Colorful clay is a timeless favorite among children, sparking hours of imagination and creativity. However, the synthetic dyes and chemical preservatives found in store-bought options can pose health risks to curious little hands. Fortunately, you can easily craft your own premium, non-toxic modeling clay right at home using just a few simple kitchen staples.
This DIY version feels exactly like commercial modeling clay, is perfect for a variety of arts and crafts, and is entirely safe for children to play with. Best of all, it takes very little time to make! Next time your children ask for a new pack of clay, skip the store and follow this easy recipe.
The Ingredients You'll Need
You only need four basic items to make a generous batch of modeling clay:
-
1 cup Non-toxic white school glue (like Fevicol)
-
1 cup Cornflour (cornstarch)
-
2 teaspoons White vinegar
-
2 teaspoons Coconut oil (or any clear, colorless baby oil/vegetable oil)
Step-by-Step Instructions
-
Prep the Pan: Take a shallow, non-stick pan (a flat pan used for making crepes or omelets works beautifully). Do not turn on the heat just yet.
-
Combine the Liquids: Pour the white glue into the pan, then add the coconut oil and white vinegar. Stir them together.
-
Add the Flour & Cook: Add the cornflour to the liquid mixture. Turn your stove to the lowest possible flame.
-
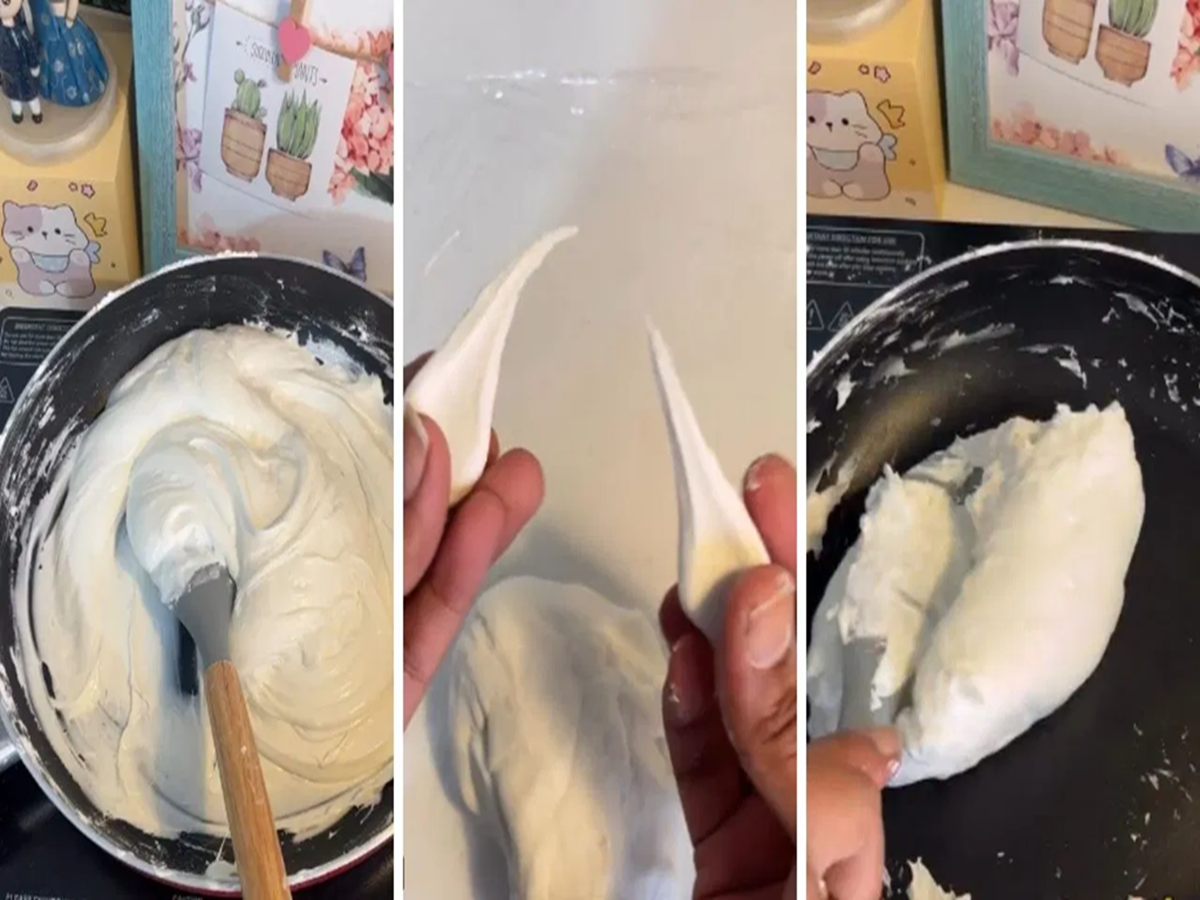
Stir Continuously: Mix everything thoroughly. Keep stirring continuously to prevent lumps from forming. As it cooks, you will notice the mixture thickening and pulling away from the sides of the pan.
-
Check the Texture: Once the entire mixture forms a single mass, stops sticking to the pan, and develops an elastic, stretchy texture, it is ready. Turn off the heat.
-
Knead Into Clay: Remove the warm clay from the pan. Lightly dust your hands or work surface with a little extra cornflour and knead the mixture thoroughly until it becomes smooth, pliable, and dough-like.
Pro-Tips for Vibrant, Colorful Clay
Once your base white clay is ready, you can easily customize it:
-
Add Vibrant Hues: Divide the clay into smaller portions and poke a small well in the center of each. Add a few drops of natural food coloring and knead until the color is evenly distributed.
-
Add a Sweet Scent: Kids love scented dough! Knead a drop of vanilla extract or any child-safe essential oil into the clay to give it a lovely fragrance.
Crucial Care and Storage Tips
Because this homemade clay lacks harsh chemical preservatives, follow these simple storage rules to keep it fresh:
-
Prevent Sticking: If the clay feels a bit sticky while kneading, rub a little Vaseline or baby oil onto your palms instead of adding more cornflour.
-
Keep it Moist During Play: Homemade clay can dry out fast when exposed to air. Wrap it in a slightly damp cloth while the kids are working with it.
-
Store in the Fridge: When playtime is over, place the clay inside an airtight container or a sealed zipper bag and store it in the refrigerator.
-
Revive Dry Clay: If you notice the clay has dried out a little over time, simply sprinkle a few drops of water onto it and knead it thoroughly to restore its soft, pliable texture.